Mastering Process Map Creation for Better Workflow Efficiency

Every organization faces challenges in managing workflows effectively. Without a clear understanding of how tasks flow from start to finish, teams often encounter delays, miscommunication, and wasted effort. Creating a process map offers a powerful way to visualize workflows, identify bottlenecks, and improve overall efficiency. This post explains how to create effective process maps and use them to enhance your work processes.
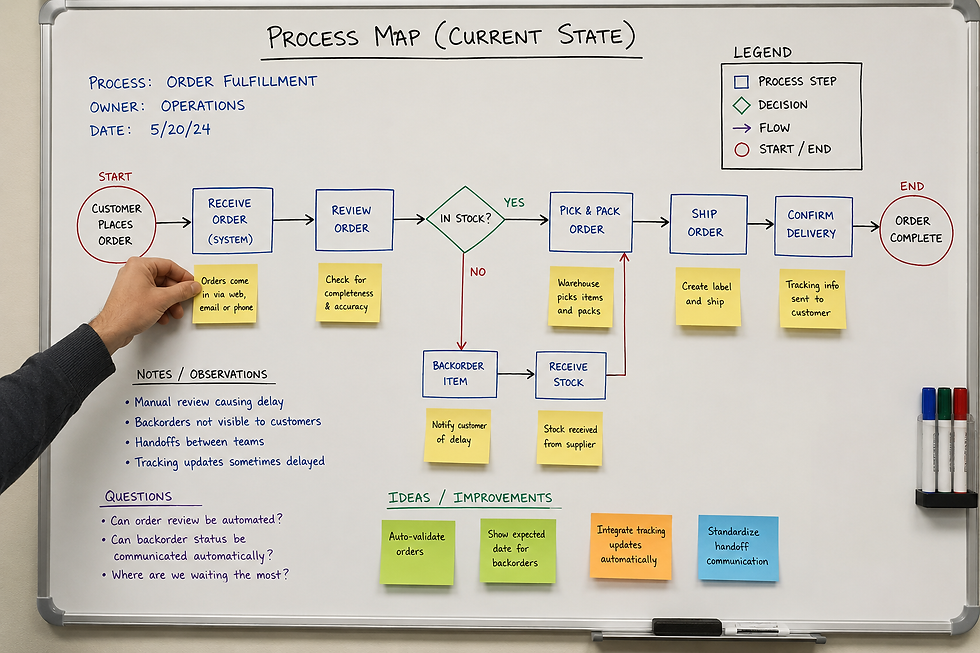
What Is a Process Map and Why It Matters
A process map is a visual representation of the steps involved in completing a task or project. It breaks down complex workflows into simple, understandable parts. By mapping out each step, you can see how tasks connect, where delays happen, and which parts need improvement.
Process maps help teams by:
Clarifying roles and responsibilities
Highlighting unnecessary or repetitive steps
Improving communication across departments
Supporting training and onboarding
Providing a baseline for continuous improvement
For example, a customer service team might use a process map to track how a support ticket moves from submission to resolution. This helps identify delays in response times or unclear handoffs between team members.
Steps to Create a Clear Process Map
Creating a useful process map requires careful planning and attention to detail. Follow these steps to build one that truly improves your workflow.
1. Define the Process Scope
Start by deciding which process you want to map. Be specific about the start and end points. For example, if you want to map the hiring process, the start might be "Job opening approved" and the end "Candidate hired and onboarded."
2. Gather Information
Talk to the people involved in the process. Ask them to describe each step, the decisions made, and any challenges they face. Collect documents, forms, or tools used during the process.
3. List the Steps
Write down every step in the order it happens. Include decision points where the process might branch into different paths. For example, a loan approval process might have a decision point for "Credit check passed?"
4. Choose a Mapping Tool
You can create process maps using simple tools like paper and pen, or digital tools such as Microsoft Visio, Lucidchart, or even PowerPoint. Digital tools make it easier to edit and share the map.
5. Draw the Map
Use standard symbols to represent different elements:
Ovals for start and end points
Rectangles for process steps
Diamonds for decision points
Arrows to show flow direction
Arrange the steps logically from left to right or top to bottom. Keep the map clean and easy to follow.
6. Review and Validate
Share the draft map with the team members involved. Ask for feedback to ensure accuracy and completeness. Adjust the map based on their input.
7. Use the Map to Improve
Analyze the map to spot inefficiencies, delays, or unnecessary steps. Discuss possible improvements and update the process accordingly.
Examples of Process Map Applications
Process maps work well in many areas. Here are some practical examples:
Manufacturing: Mapping assembly line steps to reduce downtime and improve quality control.
Healthcare: Visualizing patient admission and discharge procedures to enhance care coordination.
Software Development: Tracking bug reporting and resolution to speed up fixes.
Human Resources: Outlining employee onboarding to ensure consistent training and paperwork completion.
Each example shows how a clear process map can reveal hidden issues and guide better decision-making.
Tips for Effective Process Mapping
To get the most from your process maps, keep these tips in mind:
Keep it simple: Avoid clutter by focusing on key steps and decisions.
Use clear labels: Name each step with action verbs like "Review," "Approve," or "Send."
Involve the team: Engage those who perform the tasks to get accurate details.
Update regularly: Processes change over time, so revisit maps to keep them current.
Combine with data: Use performance metrics to support process improvements.
How Process Maps Boost Workflow Efficiency
By visualizing workflows, process maps make it easier to spot delays and redundancies. Teams can reduce errors by clarifying who does what and when. This leads to faster task completion and better use of resources.
For instance, a logistics company used process mapping to identify unnecessary paperwork in their shipping process. Removing these steps cut delivery times by 15% and lowered costs.
Process maps also support training new employees. Instead of lengthy explanations, new hires can follow the visual flow to understand their responsibilities quickly.
Final Thoughts on Process Map Creation
Creating a process map is a practical step toward improving workflow efficiency. It provides a clear picture of how work gets done and where improvements are needed. By following a structured approach and involving your team, you can build maps that lead to real, measurable gains.
Start by selecting a critical process in your organization and map it out. Use the insights gained to make changes that save time and reduce frustration. Over time, process maps become valuable tools for continuous improvement and stronger teamwork.


Comments